Xpath Basics for Testers
Published On: 2020/06/17
While using automation tools like Selenium in order to find the elements on a web page we use locators. There are mainly 8 locators which are used in Selenium
- id
- name
- className
- tagName
- linkText
- partialLinkText
- cssSelector
- Xpath
The most commonly used locators are cssSelectors and Xpath. In this tutorial we will learn the very basics of Xpath. By the end of this tutorial you should be able to understand basic Xpath syntaxes and write a few of them as well.
The basic syntax of Xpath is as follows
- //tagName[@attribute= ‘value’ ]
i.e, tag name followed by the attribute name and value of the attribute.
Or you can simply avoid the tagName and substitute it with an asterix(*) symbol inorder to access ALL the elements that fall under the given condition
- //*[@attribute=‘value‘]
In this tutorial we will be using the chrome browser and the google homepage (www.google.com ) to generate the XPath. Please note that when using a chrome browser inorder to verify the xpath the syntax is as follows.
- $x(“//tagName[@attribute= ‘value’ ] ”)
Some general syntaxes
- / Helps you move down to the immediate child of the context node
- // Helps you move down to the children and their children‘s children
- .. Helps you move up to the parent of the context node
- //* will give you a list of all the Html tags used in the page
There are a number of Xpath methods we can make use of, to locate an unique element. Some of the most commonly used xpath methods are:
- //tagName[text()= ‘value’ ] selects the element with the exact text specified
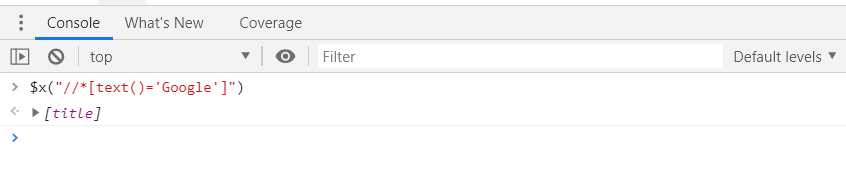
- //*[text()= ‘value’ ] selects ALL the elements with the exact text specified
Here there is only one element that contains the exact text ‘Google’
- //tagName[contains(text(), ‘value’ )] selects the element that contains the specific text.
- //tagName[not(contains(text(), ‘value’ ))] selects the element that does not contain the specific text.
- //*[contains(text(), ‘value’ )] selects ALL the elements that contains the specific text.
Here there are seven elements that contains the text ‘Google’

There are Attribute Selectors which helps us to locate unique web page elements. Some of the most commonly used attribute selectors are:
- //tagName[@attribute= ‘value’ ] will select the elements with the given attribute value.
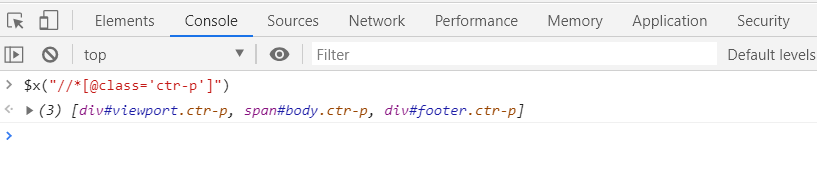
- //*[@attribute= ‘value’ ] will select ALL the elements with the given attribute value.
Here there are three elements that get selected when using the class attribute
- //tagName[@attribute= ‘value’ ]//tagName[@attribute= ‘value’ ] multiple XPath declarations are chained to uniquely identify an element.
- //tagName[@attribute= ‘value’ ][@attribute= ‘value’ ] multiple attributes are chained to uniquely identify an element.
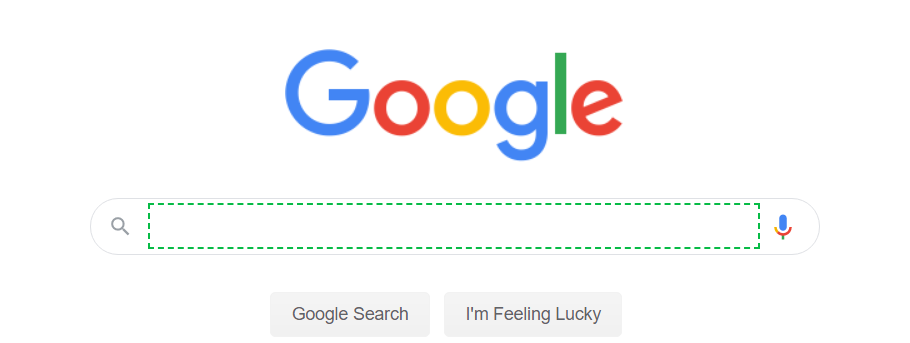
Here by chaining multiple attributes we are able to uniquely identify the input element.

- //tagName[contains(@attribute, ‘value’ )] will select all elements that contains the given attribute value
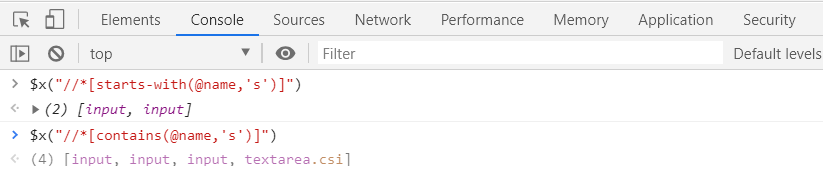
- //tagName[starts-with(@attribute, ‘value’ )] will select all elements that starts with the given attribute value
- //tagName[ends-with(@attribute, ‘value’ )] will select all elements that ends with the given attribute value
- //tagName[matches(@attribute, ‘RegEx’)] It checks whether an item matches the given regular expression.
Here the starts-with method returns two input elements and the contains method returns four different elements
XPath Axis Navigators are methods which are used to locate dynamic elements. Usually these elements cannot be located using normal XPath methods and can be located in the DOM only relative to other elements. The following are a few axis navigators we commonly use
- //tagName[@attribute= ‘value’ ] /.. will access the parent node
- //tagName[@attribute= ‘value’ ] /parent::tagname will access the parent node
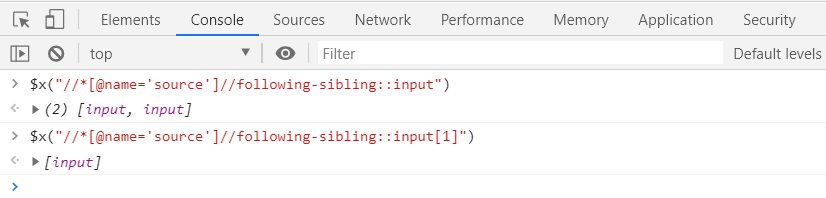
- //tagName[@attribute= ‘value’ ] /following-sibling::tagname will access the immediately following sibling node
- //tagName[@attribute= ‘value’ ] /preceding-sibling::tagname[1] will access the immediately preceding sibling node
Here we have four input tags under the same div. We can use the following-sibling axis navigator to access the required input element.

XPath “and” “or” Operator methods can be used to locate elements based on conditions.
- //*[@attribute=‘value’ and @attribute=‘value’] selects the element matching with both the attributes and specified values.
- //*[@attribute=‘value’ and not(@attribute=‘value’)] selects the element matching with one attribute value and not matching the other attribute value.
- //*[@attribute=‘value’ or @attribute=‘value’] element with @id X or a name X selects the element matching with either one of the attribute values specified.
Here we are using the ‘and’ operator to select an unique element.

There are 3 types of Xpath
Absolute Xpath : Here the element is selected starting from the root node. So a small change in the page can break this xpath. Given below is the absolute Xpath to access the input search box in google.

Partial Xpath : It wouldn’t be as lengthy as the absolute Xpath. It is more like a part of the absolute Xpath. A partial xpath to access the input search box in google is as follows:

Relative Xpath : In Relative Xpath we don’t start from the root node and hence it wouldn’t be as lengthy as the other two variants absolute xpath and partial xpath. A relative Xpath to access the input search box in google is as follows:

Conclusion
In this tutorial we have covered all the basic XPath syntaxes you would require in your Automation testing journey. Once you master these basics it will help you in writing more reliable automation test scripts.