How to configure Traefik proxy in a VPS for web application hosting
Published On: 2022/05/16
Setting up applications in a remote VPS server nowadays is not a tough job. There are many stack available in the software industry to setup our web applications in a VPS. We have selected the stack NextJs, FastApi and Traefik to host our web application in VPS.
Setup VPS
There are many hosting providers in the market. Buy a VPS that matches your need. If you need to host a web application then it is worth considering purchasing a domain name. Once you have a server machine ready, adjust the configuration to login only using SSH. You could follow the below instructions to do these adjustments.
Use RSA keypair for the ssh login
ssh-keygen -t rsa It will generate public and private keys. The public key should be copied to the server while the private key stay in your local machine.
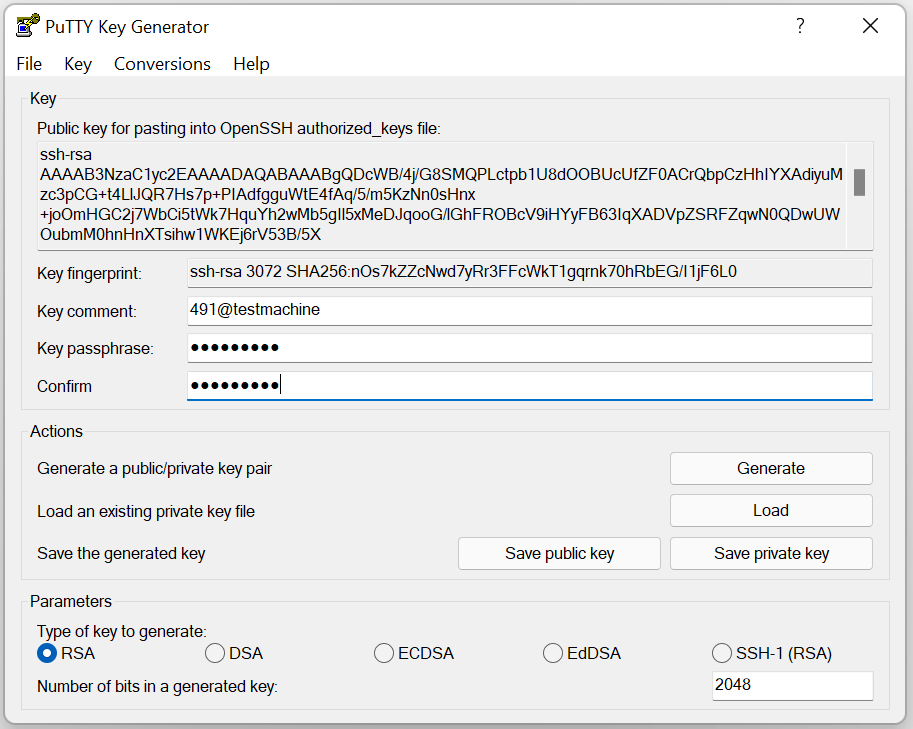
If you are using a windows system then you could use the PuTTYgen software to generate the keypair.

- Connect to your server/VPS with root SSH credentials. Run the below commands to add public key for passwordless login.
- mkdir ~/.ssh
- touch ~/.ssh/authorized_keys
- chmod 700 ~/.ssh
- chmod 600 ~/.ssh/authorized_keys
- vi ~/.ssh/authorized_keys
Copy the content of the .pub file, which is generated from ssh-keygen command, to the authorized_keys file.
- Open the /etc/ssh/sshd_config configuration file in vi or nano editor
- set the value no to the property PasswordAuthentication
- set the value yes to the property PubkeyAuthentication
- set the value .ssh/authorized_keys to the property AuthorizedKeysFile
- set the value no to the property UsePAM
- You could set the value no to the property PermitRootLogin if you need to allow only non root login.
It is a good idea to allow traffic only to a selected port numbers. In case of web application you could allow traffic only to 80 and 443 ports. For this purpose we could use the firewall UFW. You could follow the below instruction to setup UFW.
ufw default allow outgoing ufw default deny incoming ufw allow OpenSSH ufw allow ssh ufw allow 22 // If you change the ssh port in sshd_config then use that port ufw allow 80 ufw allow 443 ufw enable
You could use the ufw commands ufw show added, ufw status numbered, ufw delete to view and delete the items that are not required.
Application servers
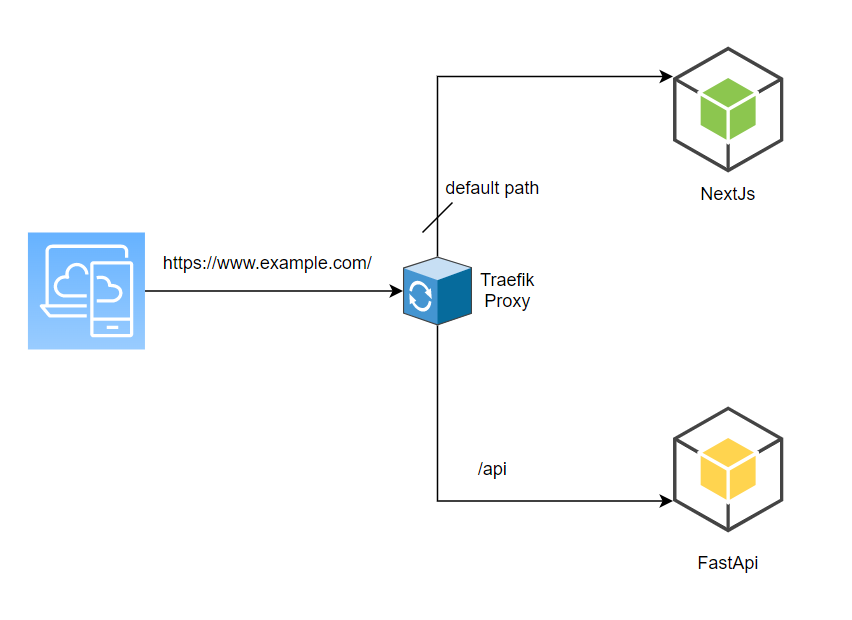
In the current setup we have used NextJs as our UI framework which is running in production mode, python FastAPI framework to build APIs and Traefik as reverse proxy. We have added below some samples of our configuration so it would help you to easily setup your application in a VPS.

traefik configuration
At startup, Traefik searches for static configuration in a file named traefik.yml (cofiguration also support toml extension) in the working directory or in the below given directories.
- /etc/traefik/
- $XDG_CONFIG_HOME/
- $HOME/.config/
This could be overridden if you set the –configFile option in the command line argument.
traefik –configFile=path/to/config/customTraefik.yml
In this configuration file we have configured the entry points and the configuration file to the providers configuration. The providers configuration details are added in the next sections.
providers:
  file:
    filename: web_proxy.yml
entryPoints:
  web:
   address: ":80"
  websecure:
    address: ":443"
log:
  level: WARN
traefik routers
The routers configurations are added in the web_proxy.yml file. The routers will direct the message to the appropriate service endpoints.
http:
  routers:
    api-router:
      service: api-path
      rule: "Host(`www.example.com`) && PathPrefix(`/api/`)"
      tls: {}
    default-router:
      service: default-path
      rule: "Host(`www.example.com`) && PathPrefix(`/`)"
      tls: {}

  services:
    api-path:
      loadBalancer:
        servers:
        - url: http://localhost:8000/api/
        passHostHeader: true
    default-path:
      loadBalancer:
        servers:
        - url: http://localhost:3000/
        passHostHeader: true
TLS configuration
Follow the process offered by your domain name provider (for free ssl certificate) and generate the certificate and server key. The certificate could be placed in a directory /etc/traefik/ssl or in any other directory as given below in the example. Configure the certifcate path under the tls section in the providers configuration file (web_proxy.yml).
tls:
  certificates:
    - certFile: /root/bin/ssl/example.com.crt
      keyFile: /root/bin/ssl/server.key
  stores:
    default:
      defaultCertificate:
        certFile: /root/bin/ssl/example.com.crt
        keyFile: /root/bin/ssl/server.key
http to https trafic
The below configuration in the traefik.yml will direct the http traffic to https.
entryPoints:
  web:
   address: ":80"
   http:
     redirections:
       entryPoint:
         to: "websecure"
  websecure:
    address: ":443"
non-www to www trafic
You could redirect a non-www traffic to www using the below configuration. If you want to redirct a www traffic to non-www then adjust the configuration in the rule, replacement and regex.
http:
  routers:
   ....
   ....
    default-redirect-router:
      service: noop
      rule: "Host(`example.com`) && PathPrefix(`/`)"
      middlewares: "www-redirect"
      tls: {}

  middlewares:
    www-redirect:
      redirectregex:
        regex: "^https?://example.com"
        replacement: "https://www.example.com"
        permanent: true

  services:
    ....
    ....
    noop:
      loadBalancer:
        servers:
        - url: ""
        passHostHeader: true
Manage DNS
An A record points a hostname to an IP address. You can add multiple A records for a host name. Add the type A record www.example.com that points to your server ip address. Add another type A record example.com that points to your server ip address. This will ensure that a request to your domain will hit the traefik proxy in your server.
Conclusion
In this tutorial we have gone through the configuration to setup a simple application using proxy to route the traffic to API and Web servers.