OpenAPI with Apicurio and Keycloak
Published On: 2019/01/10
“The OpenAPI Specification (OAS) defines a standard, programming language-agnostic interface description for REST APIs, which allows both humans and computers to discover and understand the capabilities of a service without requiring access to source code, additional documentation, or inspection of network traffic”. Please check the link https://github.com/OAI/OpenAPI-Specification for more information on OpenApi.
In this article we will cover how to configure Apicurio with Keycloak in your local machine and creating sample REST Api.
Please install java version 8+ before setting up keycloak and apicurio
Keycloak Setup
Keycloak is an opensource identity and access management (IAM) software which could control the access of users to Apicurio server.
- Download the server from https://www.keycloak.org/downloads.html
- Go to the [installation folder]/bin and start a terminal
- Run standalone.sh (linux) ,standalone.bat (windows)
This will start the Keycloak server. Create admin user for the Keycloak administration.
 Login to the Keycloak server with the username you just created.
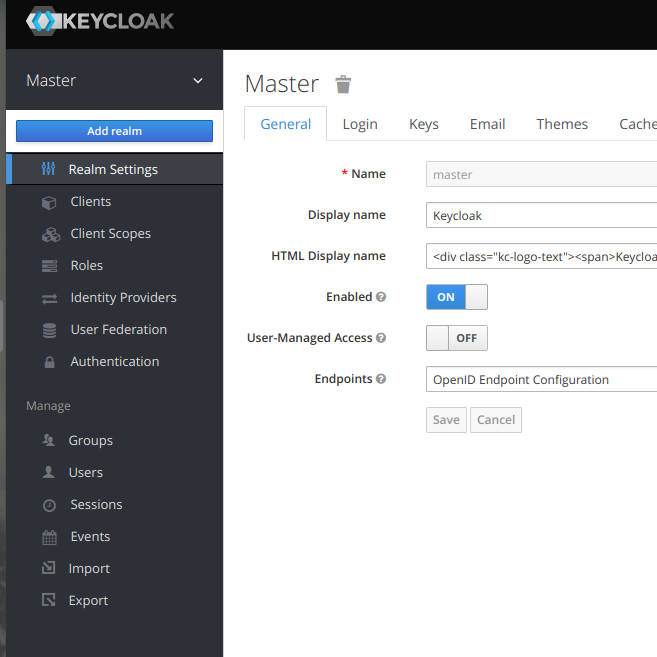
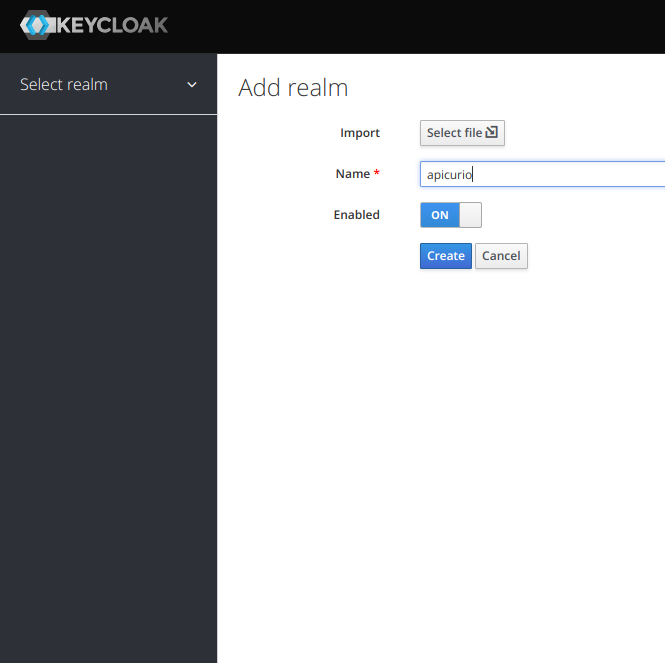
Once you logged in then create a new realm configuration for Apicurio.
 Create a client under the Clients in the side menu.
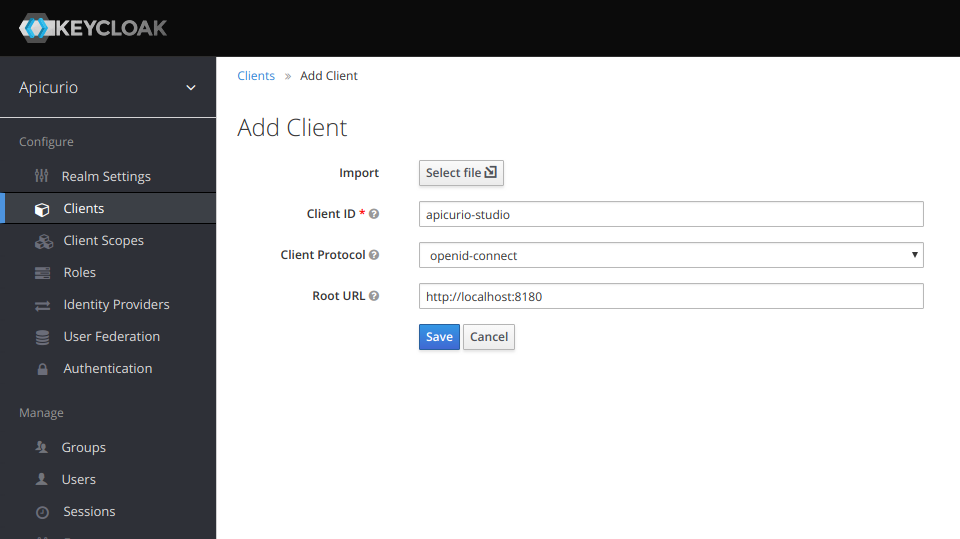
In the client configuration given the below values to link it with Apicurio server.
Client ID: apicurio-studio (this could be any meaningfull id)

Root URL : http://localhost:7080

Valid Redirect URIs : http://localhost:7080/*

Admin URL : http://localhost:7080

Web Origins : http://localhost:7080
Create a user using Users menu. This user credential can be used to login to Apicurio for creating APIs.
Apicurio Setup
Download Apicurio from https://www.apicur.io/download/
Go to the [installation folder]/bin and start a terminal
Edit the standalone-apicurio.xml with the following settings parameters.
 <system-properties>
     <property name="apicurio.kc.auth.rootUrl" value="http://localhost:8080/auth"/>
     <property name="apicurio.kc.auth.realm" value="apicurio"/>
     <property name="apicurio.hub.storage.jdbc.type" value="h2"/>
     <property name="apicurio.hub.storage.jdbc.init" value="true"/>
 </system-properties>
The value of the parameter “apicurio.kc.auth.rootUrl” route the login to keycloak server. The value of “apicurio.kc.auth.realm” should match with the realm configuration done in keycloak for Apicurio.
 <socket-binding-group name="standard-sockets" default-interface="public" port-offset="${jboss.socket.binding.port-offset:0}">
     <socket-binding name="management-http" interface="management" port="${jboss.management.http.port:9994}"/>
     <socket-binding name="management-https" interface="management" port="${jboss.management.https.port:9996}"/>
     <socket-binding name="ajp" port="${jboss.ajp.port:7009}"/>
     <socket-binding name="http" port="${jboss.http.port:7080}"/>
     <socket-binding name="https" port="${jboss.https.port:7443}"/>
     <socket-binding name="txn-recovery-environment" port="4712"/>
     <socket-binding name="txn-status-manager" port="4713"/>
     <outbound-socket-binding name="mail-smtp">
         <remote-destination host="localhost" port="25"/>
     </outbound-socket-binding>
 </socket-binding-group>
Port numbers are changed to avoid conflict with keycloak server.
Run standalone.sh (linux) ,standalone.bat (windows)
Once the server is up and running go to http://localhost:8080/ and this will redirect to keycloak authentication screen. Use the user credentials created in keycloak.
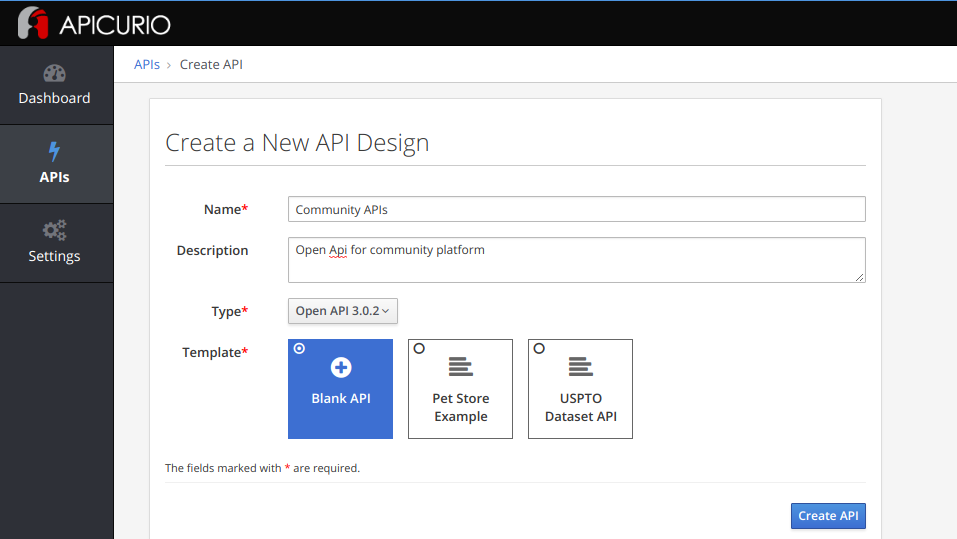
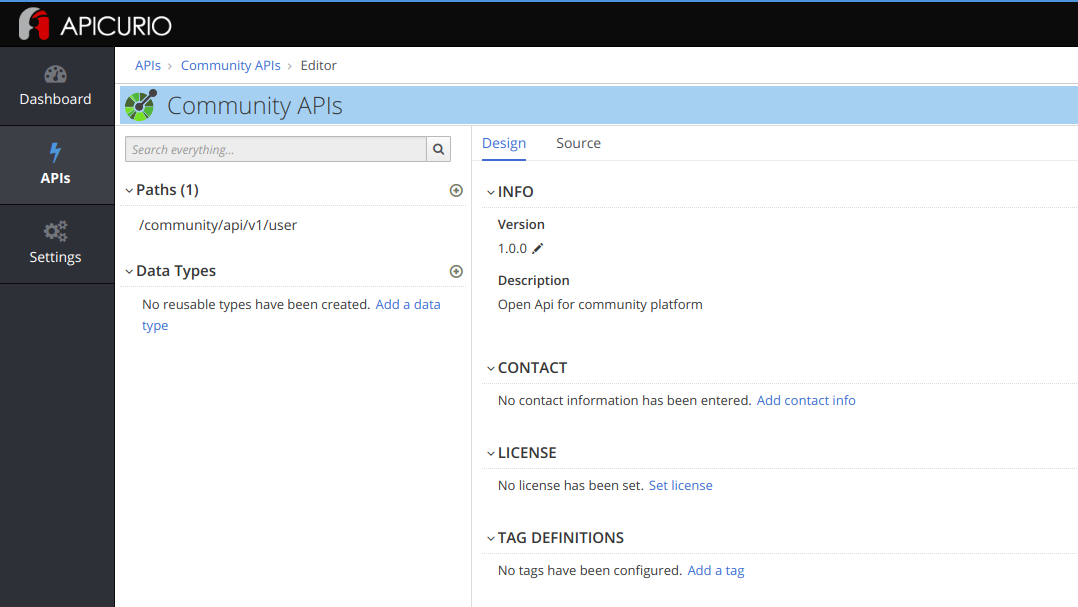
You can create a new API schema or import an existing one to Apicurio. Openapi standard or swagger 2 standards are supported.
Conclusion
Apicurio is the latest in opensource REST Api management softwares. Secured Api management is an inevitable component in a colaborated system development. This article covers the basic settings to setup the Apicurio and Keycloak to build a secured api managment system.