How to setup service mesh in IBM cloud with Istio and Kubernetes - Part 2
Published On: 2020/04/18
In the second part of the article, we will look into the setup of Istio in the kubernetes cluster. Read first part of this series to know How to setup Kubernetes Cluster in IBM Cloud.
Before we jump into the configurations of Istio, it would be good to know about microservices and role of Istio in microservice architecture.
What is microservices
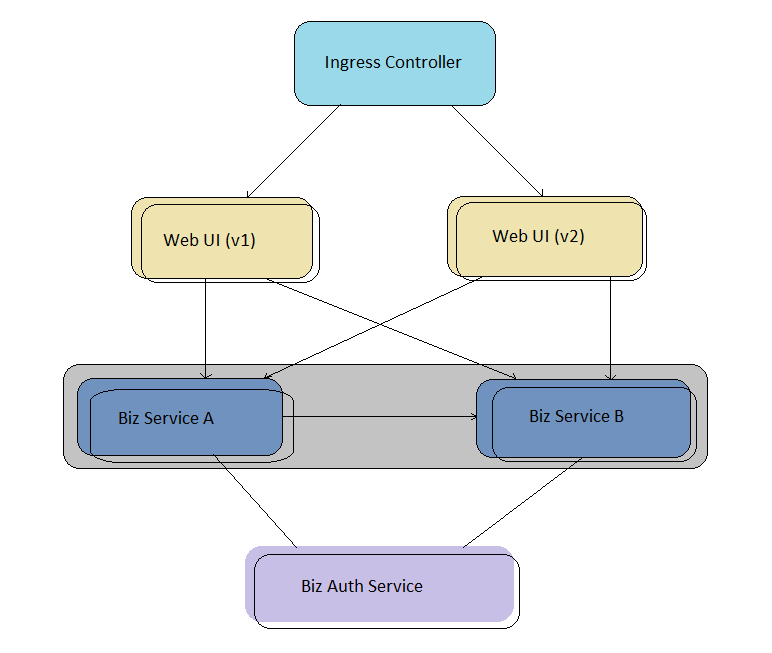
Microservices is an architectural pattern where an application is split into multiple independent business functional components based on single responsibility principle. Each component has a well defined interface, its own release cycle and runs in its own space. This allows the teams to deploy multiple versions of the same component in the application space.

What is the role of Istio in microservices
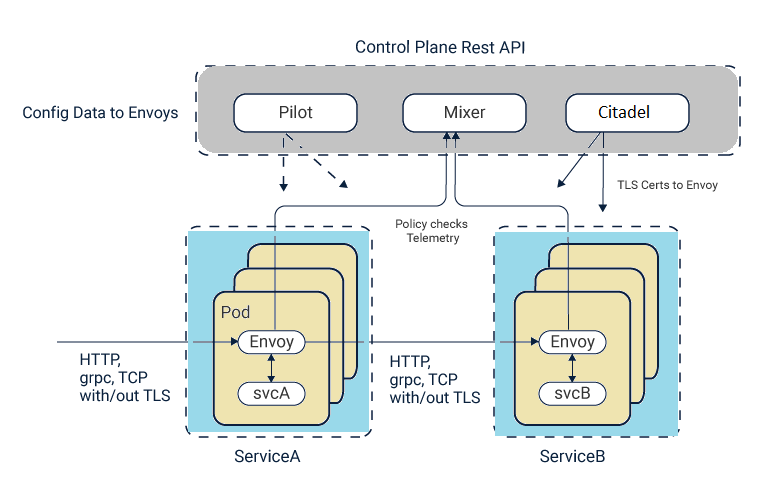
The splitting of a monolith to distributed components incur some operation complexity and so requires operational components to monitor and manage the business components. Istio places its intelligent service mesh into operational space to handle the load balancing, service proxy & discovery, circuitbreaking, secure communication, access control and feeds the operational metrics to the monitoring applications.

As Istio handles the operational requirements of a service mesh, service development is easier and operators could easly move the applications to different environments and could easly apply the new policy schemes through configurations.
Create namespace for your application deployment
As I need to deploy a freight management solution in the Kubernetes cluster along with other application, I will be creating a namespace, “cloud-cargo”, for its deployment.
kubectl create namespace cloud-cargoNext, is to create an image pull secret so that kubernetes could use it to pull the images from container registry. You can copy an image pull secret, such as the one that is automatically created for the default Kubernetes namespace, to other namespaces in your cluster.
kubectl get secret default-us-icr-io -n default -o yaml | sed 's/default/<application-namespace>/g' | kubectl create -n <application-namespace> -f -

kubectl get secret default-us-icr-io -n default -o yaml | sed 's/default/cloud-cargo/g' | kubectl create -n cloud-cargo -f -

this will create the secret "cloud-cargo-us-icr-io".
If you want more restriction on the namespace then try to use the IBM Cloud IAM API key credentials.
Enable Istio service mesh
Istio uses an extended version of the Envoy proxy and deploys it as a sidecar in a pod with application service. This sidecar component provides the functions which includes telemetry, distributed tracing, TLS termination/initiation. You could configure it for circuit breakers, rate limits, intelligent routing for A/B testing, and canary releases.
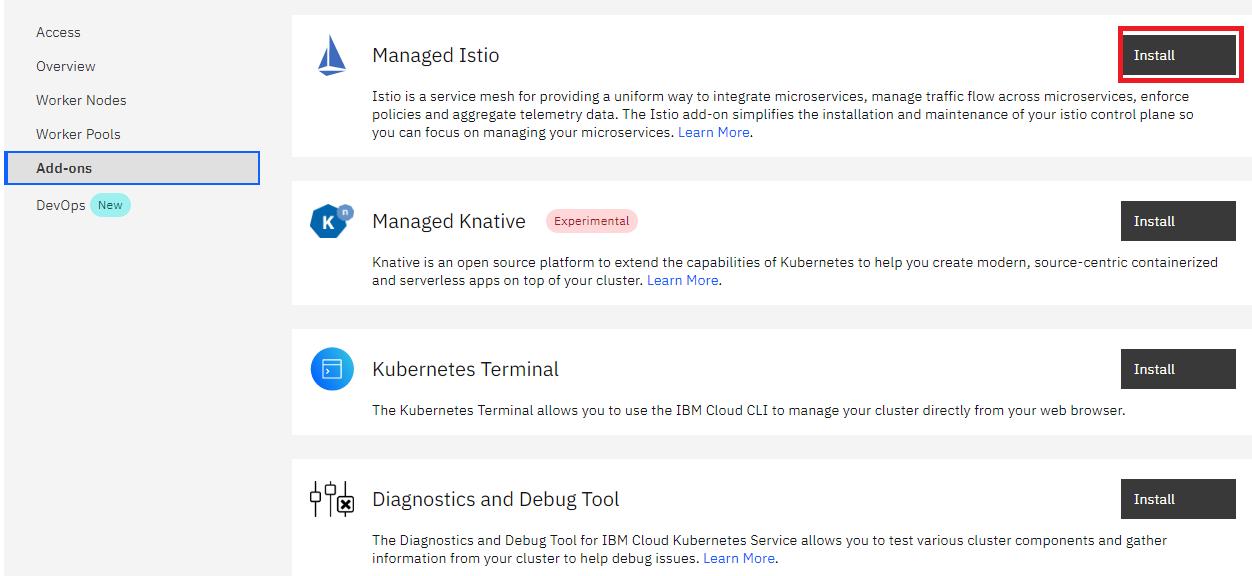
In IBM cloud you could use the Web UI to add the Istio as an add on service.

If you would like to use the CLI then follow the instruction provided in the [page] (https://cloud.ibm.com/docs/containers?topic=containers-istio)
kubectl label namespace <application-namespace> istio-injection=enabled
kubectl label namespace cloud-cargo istio-injection=enabled
The sidecar injection occur at the pod creation time. If you want to inject the sidecar into the existing pods in the namespce, then kill the existing pods and it will be recreated with the sidecar container.
Conclusion
In the second part of this series we have covered how to setup and enable Istio in the existing cluster in IBM cloud. Next part of the article has the details of Istio mTLS configuration and operational tools.