Create a simple rest service with Vert.x & Kotlin - Part2
Published On: 2019/04/05
In the part 2 , we will focus on the integration of keycloak identity and access management server. In the role-based access control(RBAC), IDM server checks the roles grated to a user against the role mapped to the resource. In this project we will configure roles in keycloak, assign it to a user and in the code checks whether the user is allowed to access the resource.
Maven Configuration
    <dependency>
        <groupId>io.vertx</groupId>
        <artifactId>vertx-auth-oauth2</artifactId>
    </dependency>
Configuration in Keycloak
- Add a client in the master realm with the values given in the below image.
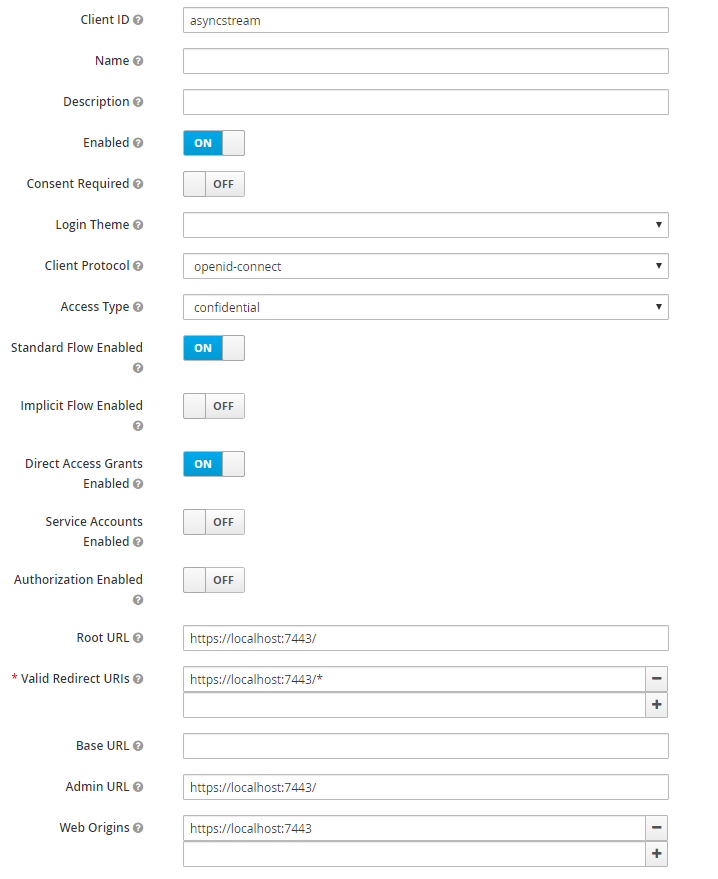
- Generate the secret token
Access type “confidential” adds the Credential tab where you can find the value of secret which can be used to connect to keycloak server. Note:You need to save after chaning the access to confidential in order to view the Credential tab.
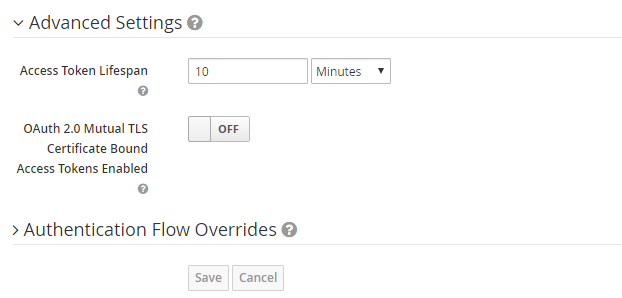
- Adjust the access token lifespan settings.
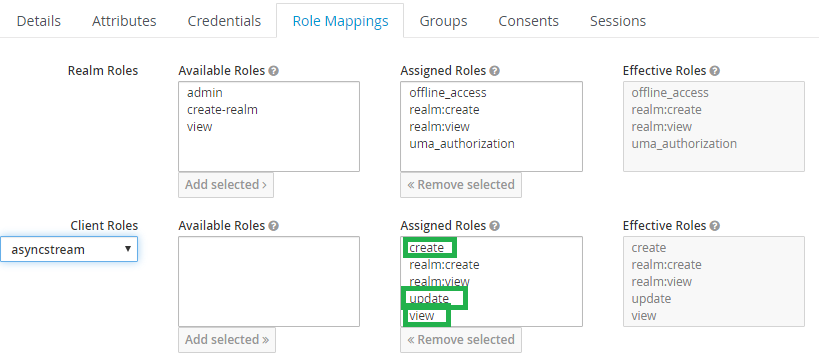
Under the roles of the client create the roles like “create”, “view” , “update” and “delete”
Add a new user to grant the view permission
In the role mapping of the user add the required roles which was created under the client configuration.
Connecting to Keycloak from the Verticle
Connect to the keycloak server after deploying the verticle.The flowtype/grant type is set to Password as this service is a first party client which accepts clients user credentials for an access token.
    val keycloak = KeycloakAuth.discoverAwait(
            vertx,
            oAuth2ClientOptionsOf()
                    .setFlow(OAuth2FlowType.PASSWORD)
                    .setSite("http://localhost:8080/auth/realms/master")
                    .setClientID("asyncstream")
                    .setClientSecret(config.getJsonObject ("client").getString("secret")))
Authentication
When the user call the login method with user credentials the server generates the token and return it to the user. The user stores this token in localstorage or a session storage based on the requirement and send to the server as Bearer token along with the subsequent requests to the server.
    // To get the access token.
    post("/login").handler(BodyHandler.create()).coroutineHandler { rc ->
        val userJson = rc.bodyAsJson
        val user = keycloak.authenticateAwait(userJson)
        rc.response().end(user.principal().toString())
    }
    //Json request
    /*{
        "username":"myusername",
        "password":"test123"
    }*/
Authorization
Before granting access to each protected resources, the server need to check whether the user is an authorized person. Add a new class Auth.kt to handle the authorization to the resource. This method receives the token from the HTTP authorization header and sends it to keycloak server to check authorization.
    suspend fun handle(ctx: RoutingContext): Route {
        val token = ctx.request().getHeader(HttpHeaders.AUTHORIZATION.toString())

        val tokenToAuthenticate = json {
            obj("access_token" to token.substring(7),
                    "token_type" to "Bearer")
        }

        val user = keycloak.authenticateAwait(tokenToAuthenticate)
        val isAuthorized = user.isAuthorizedAwait(role)

        if (!isAuthorized) {
            ctx.fail(HttpResponseStatus.UNAUTHORIZED.code())
            ctx.response().end()
        }

        ctx.put("user", user)

        return ctx.currentRoute()
} get("/test").produces("application/json").coroutineHandler {
Auth(keycloak, "view").handle(it)
it.next()
}.coroutineHandler {
it.response()
.putHeader("content-type", "application/json; charset=utf-8")
.end(Json.encodePrettily("Test"));
}Conclusion
In this article, I tried to explain how to configure a client in keycloak and use it to authenticate and authorize the user to the protected resources. This project can be used as a starting point to build an API gateway in Vert.x The source code of this article is available in github.